Products
Use the feature to view all the banking products with the Bank / Credit Union.
Menu path: Master Data Management > Products
The app displays the list of products as rows with the following details:
- Product Name: Name of the product (account / card).
- Product Group: Displays the name of the Product Group to which the listed product belongs. Each Product Group will have set of related products that are highly customizable. For example, the Saving Account Product Group contains Salary Savings Account and Student Savings Account products.
- Product Line: Displays the name of the Product line to which the listed product belongs. Each Product Line will have set of related products based on their purpose. For example, the Deposits Product Line contains Saving Account and Checking Account products.
- Status: Status of the product (Active / Inactive).
All the details listed here are fetched from the back-end system. Sort the list based on any of the columns by using the sort icon. You can also filter the list by Product Type and Status (active or inactive). You can search for the required product using the Search feature. Enter the product code or name in Search. The app will display the list of products matching the search criteria.
There are two configurations for Products feature:
- Configuration 2 - In this scenario it is assumed that the FIs / banks want to use Spotlight to manage their products. You can create new Product lines, groups, and products from Spotlight and update them as well. The FIs / bank can use reserved fields to map additional fields from the Microservice or for fields which are not available in the Microservice they can use additional attributes to create these.
- Configuration 1 - In this scenario it is assumed that the FIs / banks would mage their product either via an existing Product management tool / core. Spotlight will only fetch the product details ingested by the Microservice and you can add or edit non core details. The FIs / bank can use the reserved fields to map additional fields from the Microservice or for fields which are not available in the Microservice they can use additional attributes to create these. You cannot create any new products through Spotlight and the ingested data coming from the core is non editable.
You can make these configurations while installing the Temenos Digital suite as per your requirement.
View Product Details
Click the required row to view additional product details.
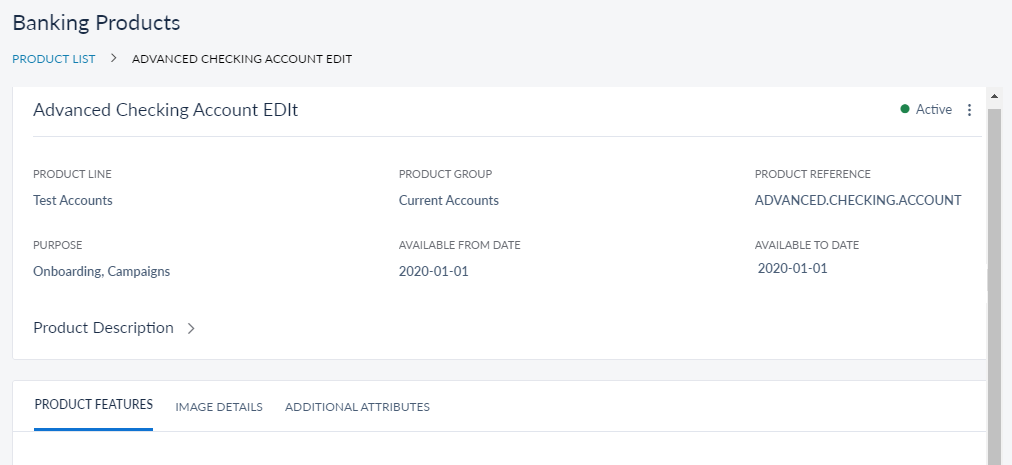
The app displays the following product details:
- Product Line
- Product Group
- Product Reference
- Purpose
- Available From Date
- Available to Date
- Status (Active / Inactive). If the products who's Available To Date has passed the mentioned date, the status of the products automatically changes to Inactive.
- Product Description. Expand the product description to view the description details like detailed description, notes, disclosure, and terms and conditions.
- Mapped reserve fields (if any)
- Product Feature details
- Image Details
- Additional Attributes
The details provided for each product depend on the type of product you have selected. The details which are marked as Not Applicable (N/A) are not related to the selected product.
Configuration 2
In this scenario, you can add new products or edit the existing products. You can also create or edit Product Lines, Product Groups, and Product Features.
Create Product Lines, Groups, and Features
Click the Setting icon on the top right corner of the Products landing page, the Manage Product Line page appears.
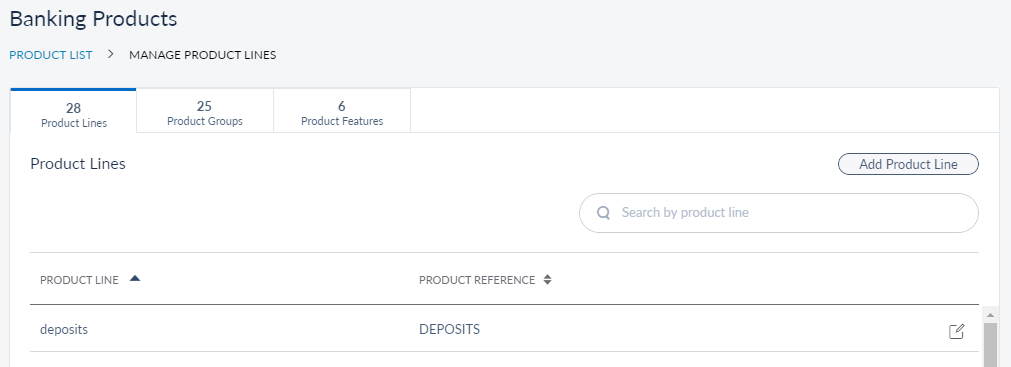
You can view and manage Product Line, Product Group, and Product Features from their respective tabs here. By default, the Product Line tab is selected. You can search for the required product using the Search field in each tab.
Product Line
In this configuration, you can add a new product line or edit the details of the existing product lines. Do the following to add a new product line:
- Click Add Product Line.
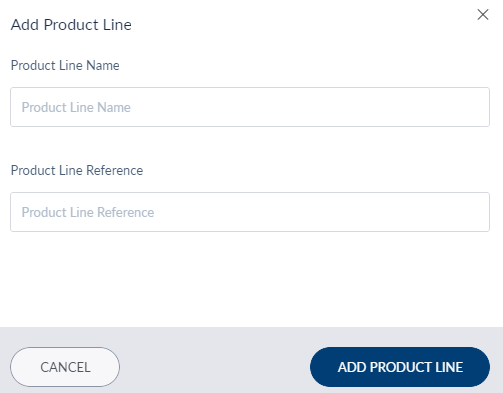
- Provide the following details:
- Product Line Name - Enter the name for the new product line.
- Product Line Reference - Provide a unique product line reference code. The banking core identifies the product line with this product line reference code.
- Click Add Product Line. The new Product Line is created.
If you want to edit the details of any product line, click the Edit icon on the respective product line row. The Edit Product Line page appears. You can only edit the Product Line Name. Click Update once you are done with your changes.
Product Group
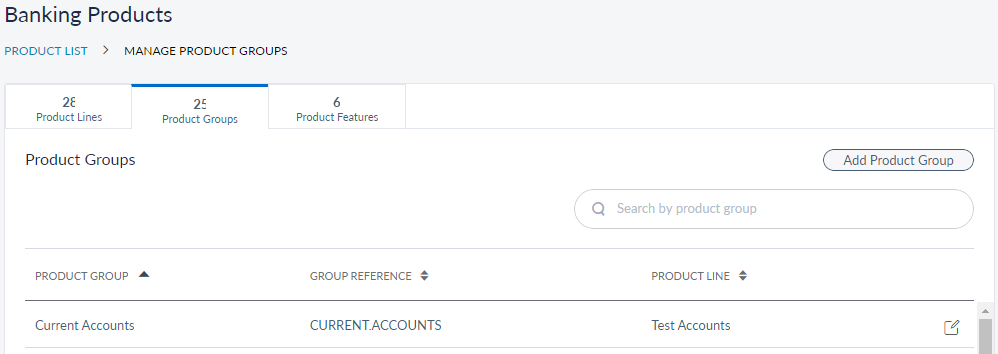
This tab displays the following details:
- Product Group
- Group Reference
- Product Line
In this configuration, you can add a new product group or edit the details of the existing product groups. Do the following to add a new product group:
- Click on Add Product Group.
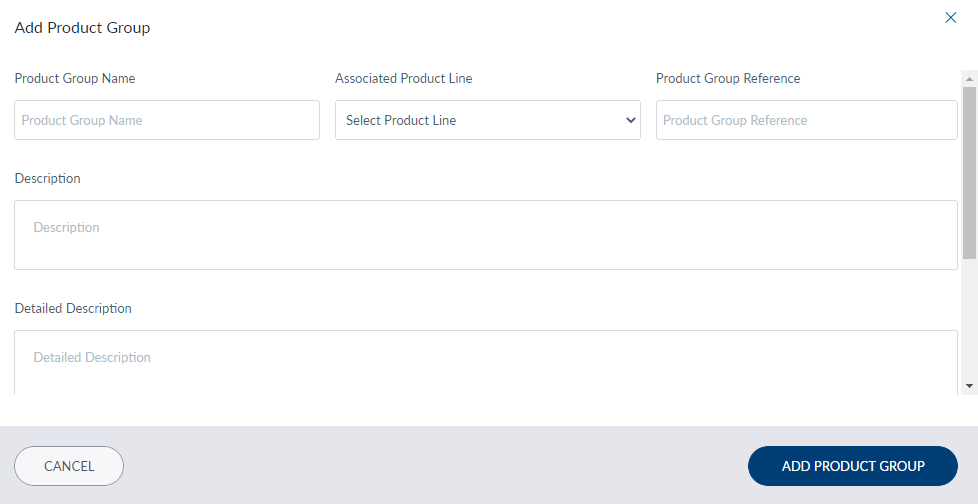
- Provide the following details:
- Product Group Name: Enter the name for the new product group.
- Associated Product Line: You must associate the new product group to a Product line. Select a product line from the list. The list items depend on existing product lines available in the Product Lines tab.
- Product Group Reference: Provide a unique product group reference code. The banking core identifies the product group with this product group reference code.
- Description: Provide a short description about the new product group.
- Detailed Description: Provide a detailed description about the new product group.
- Image Type: Select the image type from the list. It will determine how the customers would view the product group in online banking application. The listed options are Banner, Icon, Content, and Large Banner.
- Image URL: Provide the url for the image.
- If you want to add more images, click +Add Image.
- Click Add Product Group. The new Product Group is created.
If you want to edit the details of any product group, click the Edit icon on the respective row. The Edit Product Group page appears. You can edit the following details:
- Product Group Display Name
- Description
- Detailed Description
- Image Type
- Image URL
Click Update and Save after you are done with your changes.
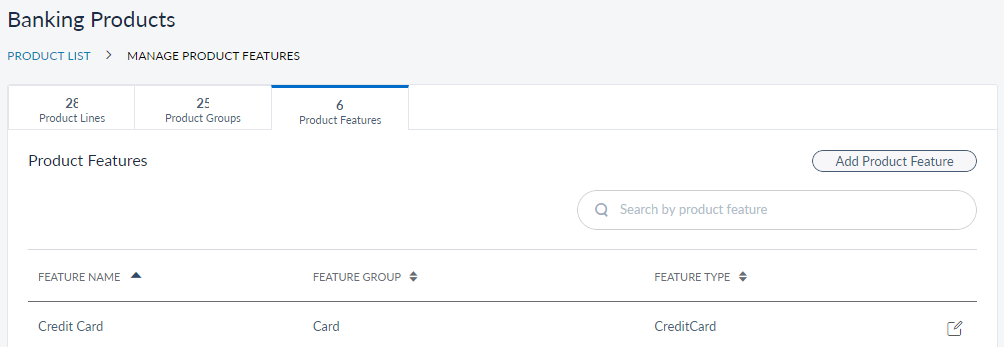
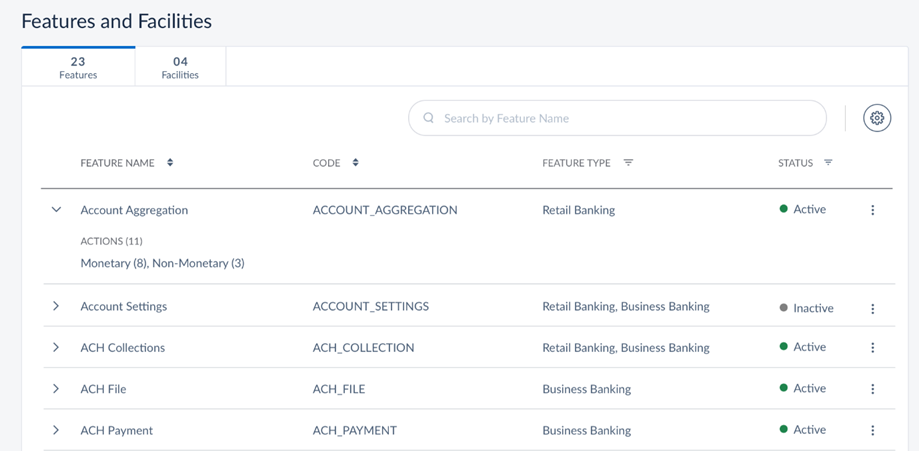
This tab displays the following details:
- Feature Name
- Feature Group
- Feature Type
In this configuration, you can add a new product feature or edit the details of the existing product features. Do the following to add a new product feature:
- Click Add Product Feature.
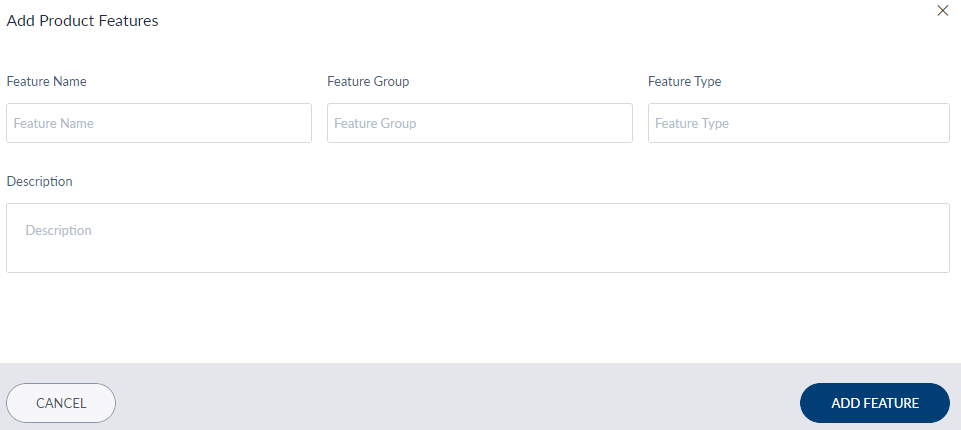
- Provide the following details:
- Feature Name: Enter the name for the new product feature.
- Feature Group: Provide the name of the feature group to which the new product feature belongs.
- Feature Type: Provide a unique feature type name that represents the new product feature.
- Description: Enter a short description about the new product feature.
- Click Add Product Feature. The new Product Feature is created.
If you want to edit the details of any product feature, click the Edit icon on the respective row. The Edit Product Features page appears. You can edit the following details:
- Feature Name
- Feature Group
- Description
Click Update and Save after you are done with your changes.
Create New Products
To create a new Product, click Add Products from the Products page. The Add Products screen appears. You can add the details about the product from the following sections:
- Product Details
- Product Facilities (This section is optional)
- Product Features
- Image Details
- Additional Information (This section is optional)
Product Details
The Product Details section contains two tabs, namely Details and Product Description. In the Details tab, you can add the following information about the new product:
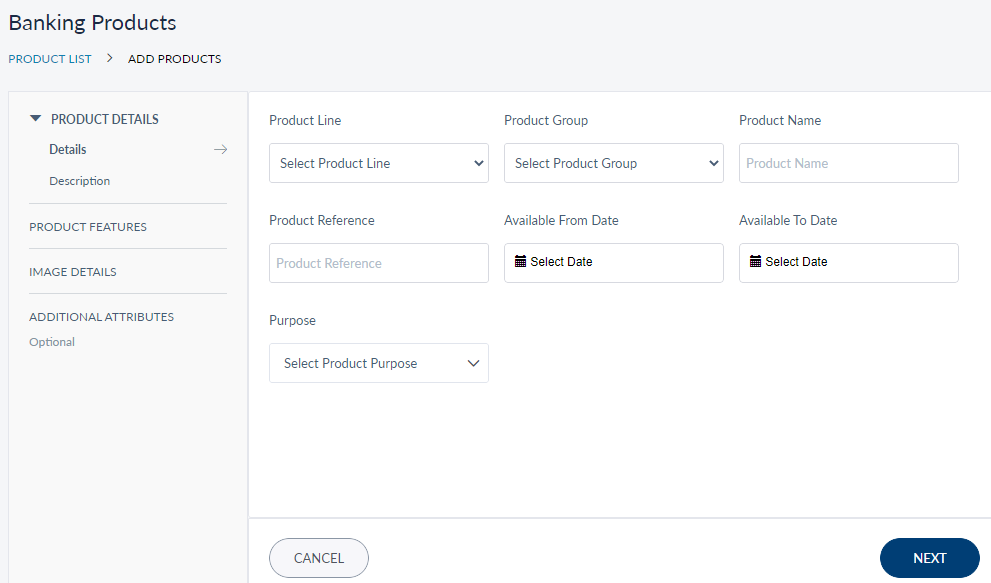
- Product Line - Select a product line from the list to which the new product relates.
- Product Group - Select a product group from the list to which the new product relates.
- Product Name - Provide a name for the new product.
- Product Reference - Provide a unique product reference code. The banking core identifies the product with this product reference code.
- Available From Date - Provide the date from when this product will be available to the customer.
- Available To Date - Provide the date till when this product will be available to the customer. Post this date, the status of the product will automatically change to Inactive.
- Purpose - Select the purpose of the new product from the list. The available options are Onboarding and Campaign.
- Label fields (Label 1, 2, 3 and so on) - These are reserve fields to which you can map any additional information that you want from the Microservice. In addition to the available information that is being captured in Spotlight, if the Microservice has additional fields to capture any other information and the bank wants to capture them, they can use the reserved fields to create those additional fields, and map them to the marketing catalog Microservice.
In the Product Description tab, you can add the following details:
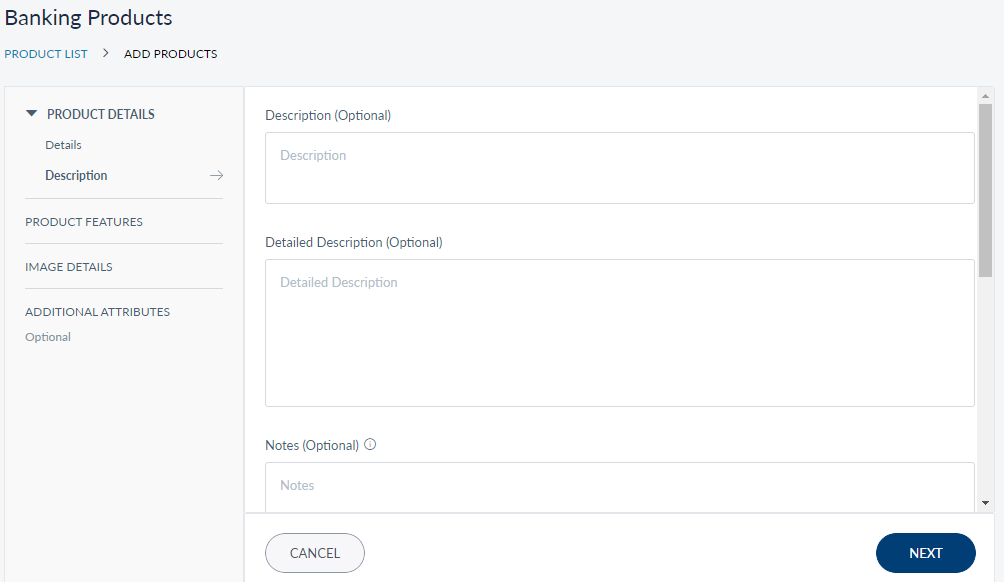
- Description - Add a short description about the new product.
- Detailed Description - Provide information about the new product in detail.
- Notes - Any important points or benefits of the product.
- Disclosure
- Terms and Conditions
Product Facilities
You can add a facility for a product, which includes Cheque Book, Credit Card, and so on.
To add a facility for a product, follow the below steps:
- From the Product Facilities page, click Add Product Facilities. A new screen to add a product facility appears.
- Enter the Facility Name, Facility Code, Description (if any), and the Sequence Number in the respective fields. Enable the check-box, if the Sequence Number is mandatory.
- Under the Option Details section, select a value for the Option Display Type from the drop-down list.
- Enter a Value. Enable the Default Value check box, if the entered value is by default.
- Enter the Description (if any) and click Save and Close.
Product Features
- You can add Features to the new Product from here. Click Add Features, the Add Feature screen appears.
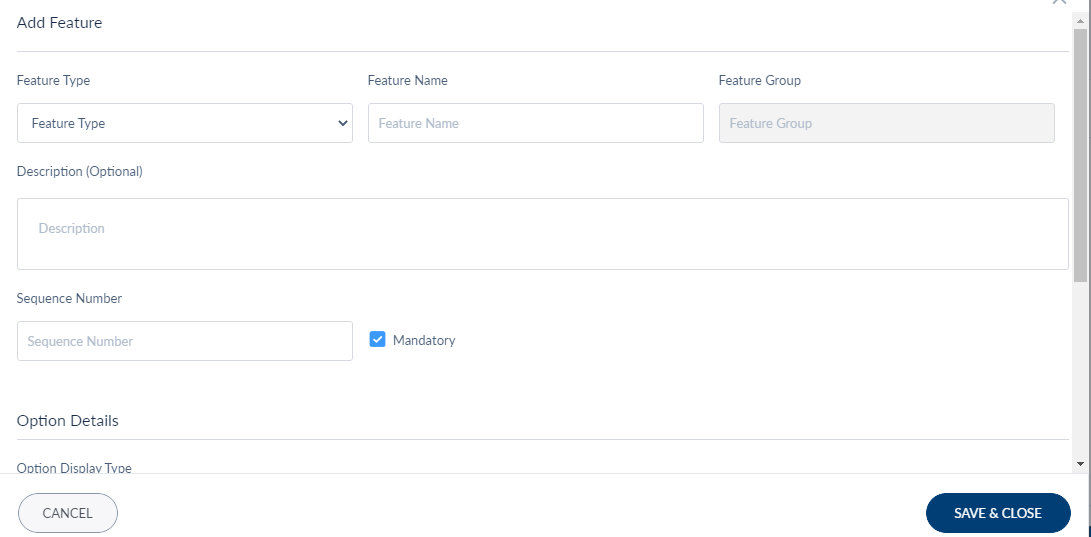

Add the following details and click Save and Close:
- Feature Type - Select the feature type from the list. The Features created in Manage Product Feature section are listed here.
- Feature Name - This field is auto-filled once you select the Feature type based on the information you provided in Manage Product Feature.
- Feature Group - This field is auto-filled once you select the Feature type based on the information you provided in Manage Product Feature.
- Description - Add a small description for the feature.
- Sequence Number - This number denotes the hierarchy of the new feature among the existing set of features.
- Option Display Type - Select the display type for the options available about the feature with which the customer can interact. The listed display types are Single Selection and check-box.
- Value - Provide the information about the options which the customer can see about the feature. When you select the Default Value check-box, the related option is selected by default when the customer views the feature.
- Description - Provide the description about the value. It is optional.
- If you want to add more values, click +Add Value.
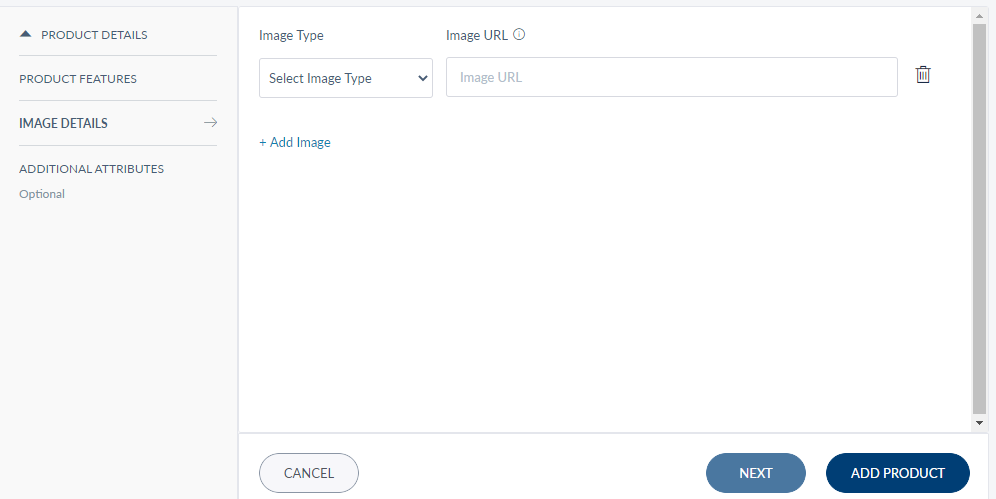
You can add image for the new product from here:
- Image Type: Select the image type from the list. It will determine how the customers would view the product in online banking application. The listed options are Banner, Icon, Content, and Large Banner.
- Image URL: Provide the url for the image.
- Click the Delete icon to remove any image details.
- Click + Add Image if you want to add more images for the product.
Additional Attributes
Use this feature to add information about any additional fields which are not available in the current process of creating the product and in the marketing catalog Microservice. You can the information about the fields in the form of Key Value pair, where the Key is the field name and Value is the details about the new field.
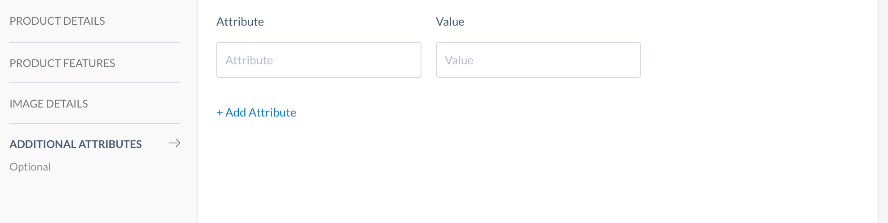
Click Add Attributes if you want to add multiple additional fields.
This section is Optional.
Edit Product Details
If you want to edit the details related to any product, from the Products landing page click contextual menu > Edit related to any product. The Edit screen appears. The Edit screen is similar to the Add Product details screen. You can update the required details and click Save.
Configuration 1
In this scenario, you can only edit the existing products. You can also edit Product Lines, Product Groups, and Product Features.
Manage Product Lines, Groups, and Features
From the Products landing page, you can also manage the Product Line, Product Group, and Product Features. In this configuration you can only edit the existing options. Click the Setting icon on the top right corner of the Products landing page, the Manage Product Line page appears.
You can view and manage Product Line, Product Group, and Product Features from their respective tabs here. By default, the Product Line tab is selected. You can search for the required product using the Search field in each tab.
Product Line
In this configuration, you can only view the Product Line name and the related Product Reference from the list. You cannot edit either of the details.
Product Group
This tab displays the following details:
- Product Group
- Group Reference
- Product Line
Click the Edit icon on the respective row to edit the related product group details. The Edit Product Group page appears. You can edit the following details:
- Product Group Display Name
- Description
- Detailed Description
- Image Type
- Image URL
Click Update and Save after you are done with your changes.
Product Feature
This tab displays the following details:
- Feature Name
- Feature Group
- Feature Type
Click the Edit icon on the respective row to edit the related product feature details. The Edit Product Features page appears. You can edit the following details:
- Feature Name
- Feature Group
- Description
Click Update and Save after you are done with your changes.
Edit Product Details
Click the contextual menu > Edit from the product details screen if you want manage the details of any product. Alternatively, you can click on any Product > View Details Screen > Contextual Menu > Edit. The Edit screen appears and you can update the details related to the following fields:
- In Details tab, you can edit Purpose, Short Description, Detailed Description, notes, Disclosure, Terms and Conditions
- In Features tab, you can edit Feature Name, Description, and Sequence Number. In Option Details section, you can edit Option Display Type, Option Values, Description, and Default Value.
- In Image Details tab, you can add or edit Image Type and Image url.
- In Additional Attributes tab, you can add or edit the attributes.
The details that are ingested from the core are non-editable. After you are done with the updates, click Save.
Mapping Reserved Fields
If the bank has a requirement to capture any additional information while creating a new product, they have to add the details about the new fields in marketing catalog Microservice. You can then map the reserved fields to the new fields created in the Microservice.
Following are the changes you have to do to the Spotlights visualizer code:
- Click on the Templates tab, and select com.adminConsole.Products.addProduct component.
- In Properties > Components pane > Product Details Screen – Additional Text Fields section, provide the appropriate Label and related Placeholder details. The values in the properties tab could be in either simple text or i18n format. If it's i18n format, define the i18n property in workspace/adminConsole/i18n.json file. If you are adding multiple additional fields, provide the label and placeholders details in a sequential order.
- Now open the addProductController.js file and look for fetchFinalAddProductJSON method.
- In the payload objects, add the name of the additional field as mentioned in the Microservice and provide the reference of the text box you added in com.adminConsole.Products.addProduct component as the additional objects value. The format of the reference can vary as per the configuration you made in Microservice. For example: scopeObj.view.tbxAdditionalField1.text.
- Click on the Templates tab, and select com.adminConsole.productManagement.viewProducts component.
- In Properties > Components pane > Extra Fields property group add the header name.
- Now open the viewProductController.js file and look for setExtraProductDetails method and add the value for the required label in the format mentioned in the Microservice.
Experience APIs
The list of products and their related information is retrieved from Marketing Catalog Microservice. The experience APIs that connect the Spotlight application with the Microservice are as follows:
| Experience API | Connected Micro - service URL |
|---|---|
| fetchProductList | http://13.76.33.216:9095/ms-marketingcatalog-api/api/v1.0.0/product/products |
Click on the respective API to know more about the API.
In this topic